GETTING STARTED:
Requirements:
In order to successfully run ‘ Our Divi Layouts ‘ on your website your server environment will have to meet certain PHP and WordPress minimal version requirements.
Essentials:
-PHP 5.4.X or higher
-In order to install our Child theme or Layouts, you must first Purchase Elegant themes Membership and Download Divi theme.
-This Divi Layouts is fully compatible with Divi v4+, just make sure that you’ve installed the latest version of Divi theme. Some features may not work correctly if the Divi theme version is less than v4.3.2.
Installation Documentation:
Files With The Product:
After you have Un-zip the file you will see :
1. →Product Files : This Folder Have A. ” All_Styles_Library ” JSON that will include all styles JSON in one file that you can import in ‘ Divi Library ‘ B. “ DiviThemeBuilder_Example “ JSON that will be imported under Divi – > Theme Builder C. license.txt file
2. → ‘ Supplementary Zip ‘ will include A. ‘ Individual Styles Library Json‘ Files B. Supporting document like [ ‘ Installation Guide Files ‘ ]
Installation Guide :
Step 1:
Import ‘ All_Styles_Library_Json ‘ Files For Layout Pack Using Divi Library Method
A. Make sure you have the latest “ Divi Theme installed “ and activated
B. Import product ‘ Library Layout (.json) File ‘ Thats is ‘All_Styles_Library_Json ’ under ‘‘ Divi -> Divi Library -> Click Import & Export
Use ” All_Styles_Library_Json “ if you want to import all styles in one shot under ‘ Divi Library ‘


D. Go to Pages → Add New and give your page a title
→ Click on Use ‘ The Divi Builder ‘
→ Click on ‘ + ‘ Icon -> Go To “ Your Saved Layouts ”

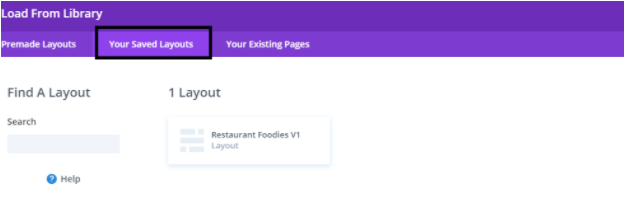
E. After selecting the layout ‘ Publish Page ‘ and see at the front end.
F. Wait until the layout is imported (it can take up to several minutes) Don’t forget to publish/save your page.
G. All icons and images will be automatically imported with the .json file
Step 2:
Import ‘ ThemeBuilderLayout ‘ JSON Available In The Product zip Files And Is Mandatory.
A. You need import ‘ Theme Builder ‘ json available in the supplementary zip and is mandatory.
Now Hover over to Divi > Theme Builder and click on ‘ Portability ‘ Button at the top right corner.
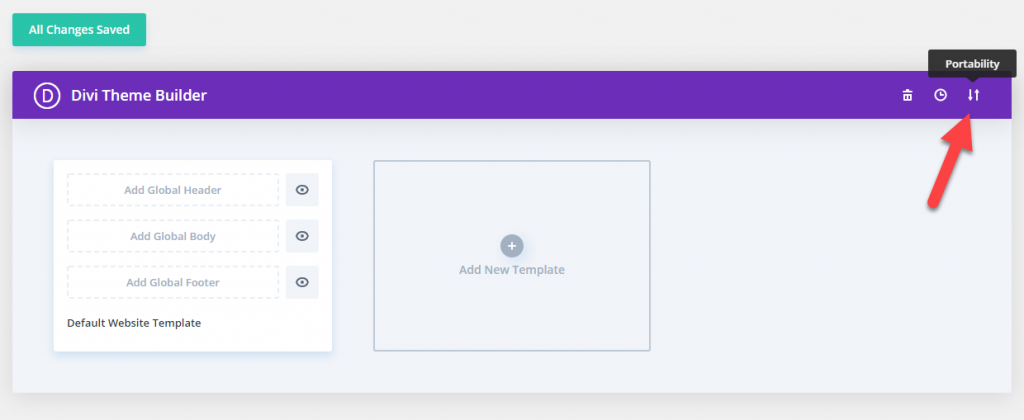
B. Now click on the Import button and then Choose the ‘ Theme Builder JSON ‘ file from the Supplementary Package you’ve downloaded and Click on Import Divi Theme Builder Templates Button.

C. After the Completion of the Importing Process, you can now click on the Save Changes button.

Step 3:
Creating Pages In Divi or Loading Required Pages From Divi Library That We Already Imported in The Previous Step
→ Click on Use ‘ The Divi Builder ‘
→ Click on ‘ + ‘ Icon -> Go To “ Your Saved Layouts ”


Select one that you want to load on your page and import.
For example if you want to load ‘ Home V1 ‘ select that from the ‘ Saved Layouts ‘ under Divi Library
B. After selecting the layout ‘ Publish Page ‘ and see at the front end.
C. Wait until the layout is imported (it can take up to several minutes) Don’t forget to publish/save your page.
D. Likewise you need to repeat same procedure and load all the ‘ Layouts ‘ that you need from ‘ Saved Layouts ‘ under Divi Library
Step 4:
Creating Menu and Set HomePage


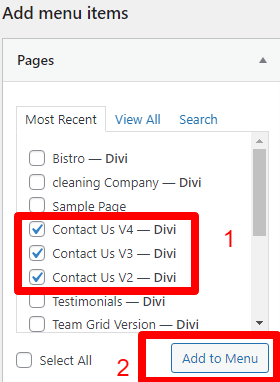
E. You can do the required setting as needed.
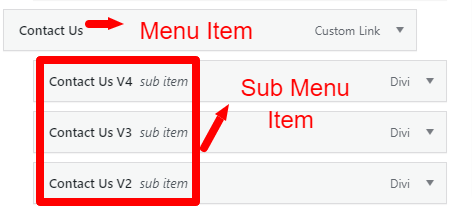
That is you can add pages that you need set as ‘ Menu Item ‘ and one as ‘ Sub Menu Item ‘
Like in example shown below have added ‘ Contact Us ‘ as menu item and ‘ Contact Us V2 to V4 ‘ as sub-menu item
F. Save the changes.
Step 5:
Set HomePage
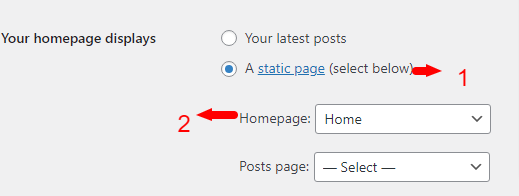
→ Select ‘ Radio Button ‘ as static page
→ Select HomePage from the drop-down that you need to set for your website like in our case it is ‘ Home ‘
Additional Help & Tutorial :
How to Change Header and Footer Contents as well as Other Theme builder templates like 404,post,category,tag etc.. contents?
Video Installation Guide:
Frequently Asked Question
FAQ 1 :
After Latest Divi Update There Is Issue With ‘ Social Media Icons ‘ or ‘ Content / Images ‘ not loading properly or There Is Text Overlapping Issue On Pages ?
Ans:
This issue is usually because of cache on the website due to recent Divi Update and can follow below steps to resolve it.
Step 1:
Go To Dashboard ->Divi -> Theme Options -> Builder -> Advanced Tab -> Static CSS File Generation
Step 2:
Click Clear Cache Button & Disable Tab -> Save Changes .
Step 3 :
For Further Resolution On Cache Follow Below Link

FAQ 2 :
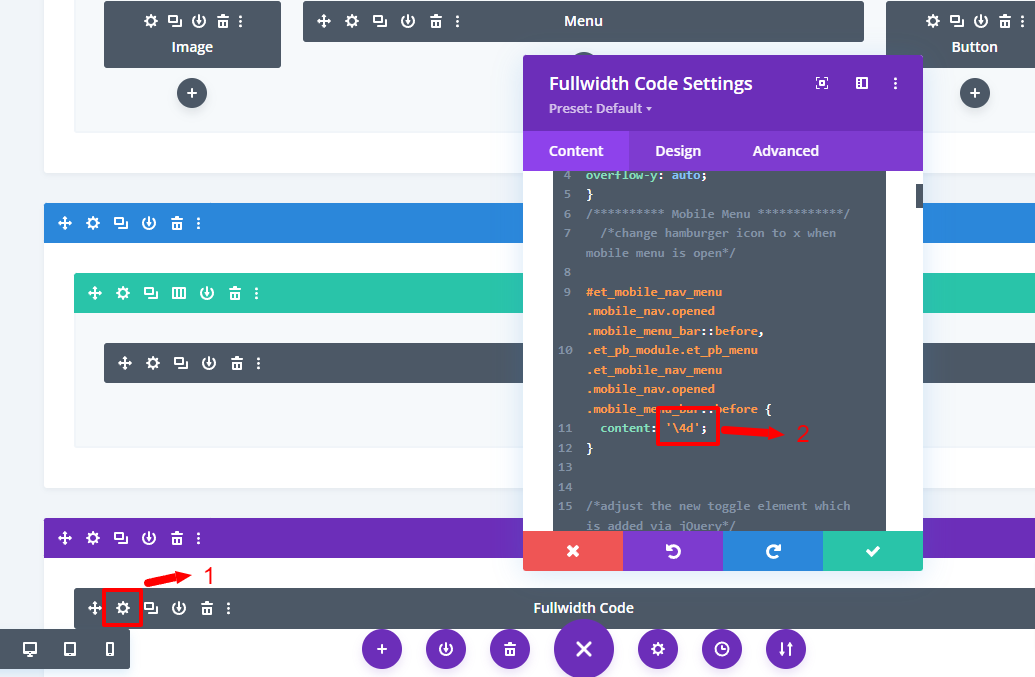
How To Resolve Issue With The Menu Icon In Responsive View ?
Go To Dashboard -> Divi -> Theme Builder -> Global Header Setting
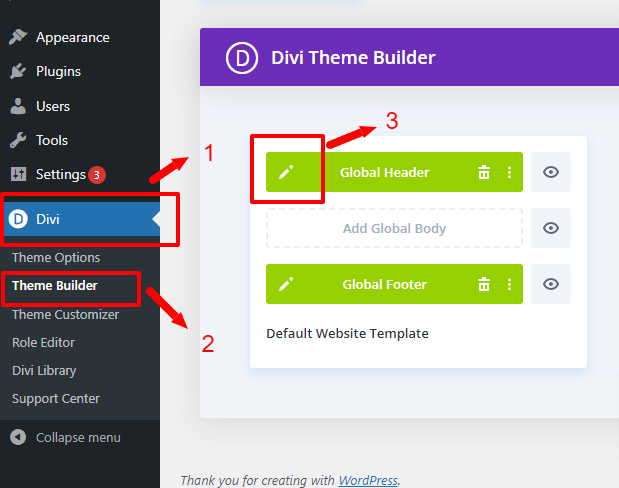

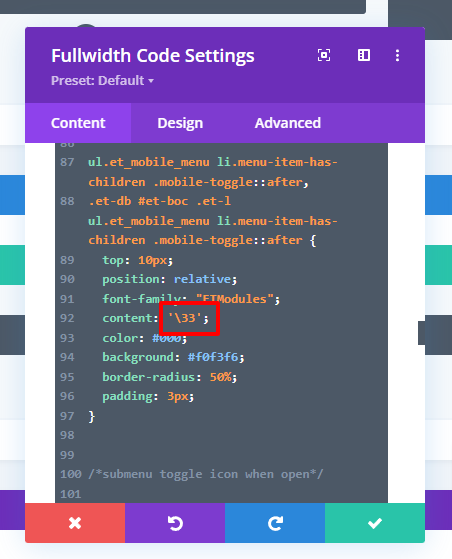
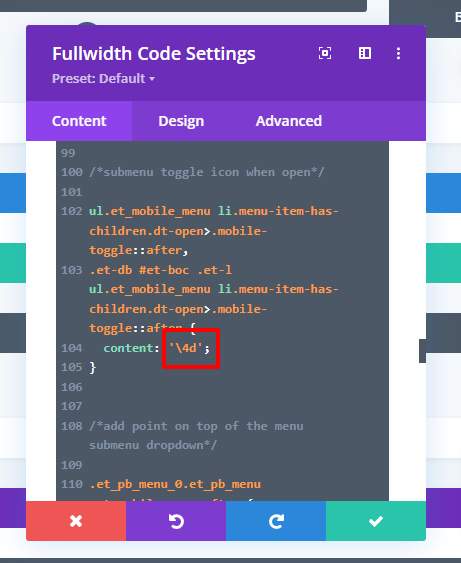
In our module you can see this at 3 places and need replace at all 3 places that is in our case
Line No:- 11,92,104
