GETTING STARTED:
In order to install our Child theme, you must first Purchase Elegant themes Membership and Download Divi theme.
This Child theme is fully compatible with Divi v4+ just make sure that you’ve installed the latest version of Divi theme. Some features may not work correctly if the Divi theme version is less than v4.3.2.
Requirements:
Theme Or Layout Bundle requires php 5.4.X or higher installed on your server.
✓ Self-Hosted WordPress Installation
✓ Divi Theme by Elegant Themes
✓ PHP version 7 or greater
✓ memory_limit 128M
✓ post_max_size 64M
✓ max_execution_time 180
✓ upload_max_filesize 64M
✓ max_input_time 180
✓ max_input_vars 5000
✓ MySQL version 5.6 or greater
✓ HTTPS support
✓ Nginx or Apache with mod_rewrite module
CHILD THEME INSTALLATION
1.Once you’ve downloaded the Child Theme Main Package, go ahead to your WordPress Dashboard > Appearance > Theme and click on Add New.

3. Then Click on Activate to activate the Child Theme.

4. Child Theme you ‘ Activated ‘ will show under Appearance > Theme
IMPORT DEMO DATA
1. Once you’ve successfully installed and activated the child theme now you can Import Demo data that comes with the theme.
You may have seen this Notification after Child theme installation.


2. Once that Done click on Return to Dashboard.
3. Now Hover over to Appearance and click on Import Demo Data.

4. Now Click on Import Demo Data Button to import all the Pages and Customizations etc.

And all the Demo Data will be imported in a few seconds, Depending on your internet connection. When it’s done it will look like this.

5. You need import ‘ Theme Builder ‘ json available in the supplementary zip and is mandatory.
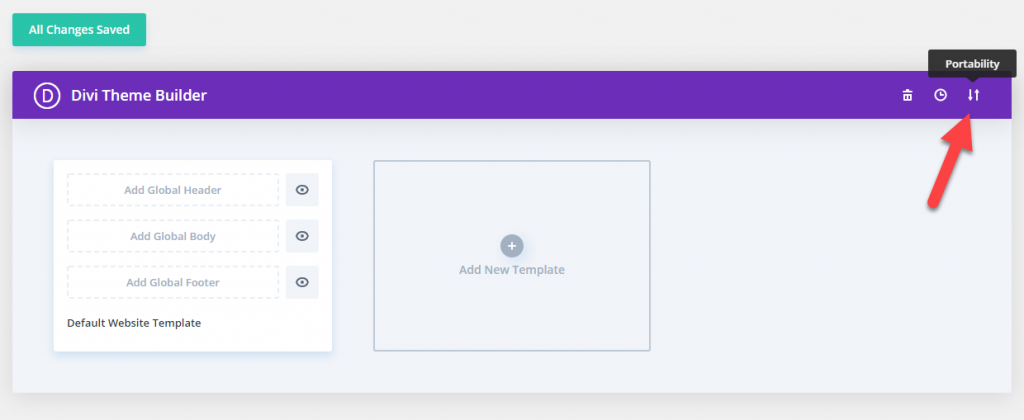
Now Hover over to Divi > Theme Builder and click on ‘ Portability ‘ Button at the top right corner.

6. Now click on the Import button and then Choose the ‘ Theme Builder JSON ‘ file from the Supplementary Package you’ve downloaded and Click on Import Divi Theme Builder Templates Button.

7. After the Completion of the Importing Process, you can now click on the Save Changes button.

9. You can change images, update css, and do customisation as needed once this process is complete.
10. You need select or verify that in WordPress Admin – > Appearance – > Menu -> setting is as mentioned below :
- ‘ Select Menu To Edit ‘ dropdown at top, Now make sure that Main Menu is selected as primary menu -> press select button to confirm
- Under Menu Structure verify that have kept Menu Name as ‘ Main Menu ‘
- At bottom under ‘ Menu Setting ‘ – > Verify that display Location have selected radio box as primary menu
Make sure all this is done and remember to save menu after verifying all this.
You can refer FAQ link mentioned below to know more about ‘ Creating Menu and Set HomePage ‘ details.

